Unlock the Power of Image Calibration in Astrophotography
Introduction
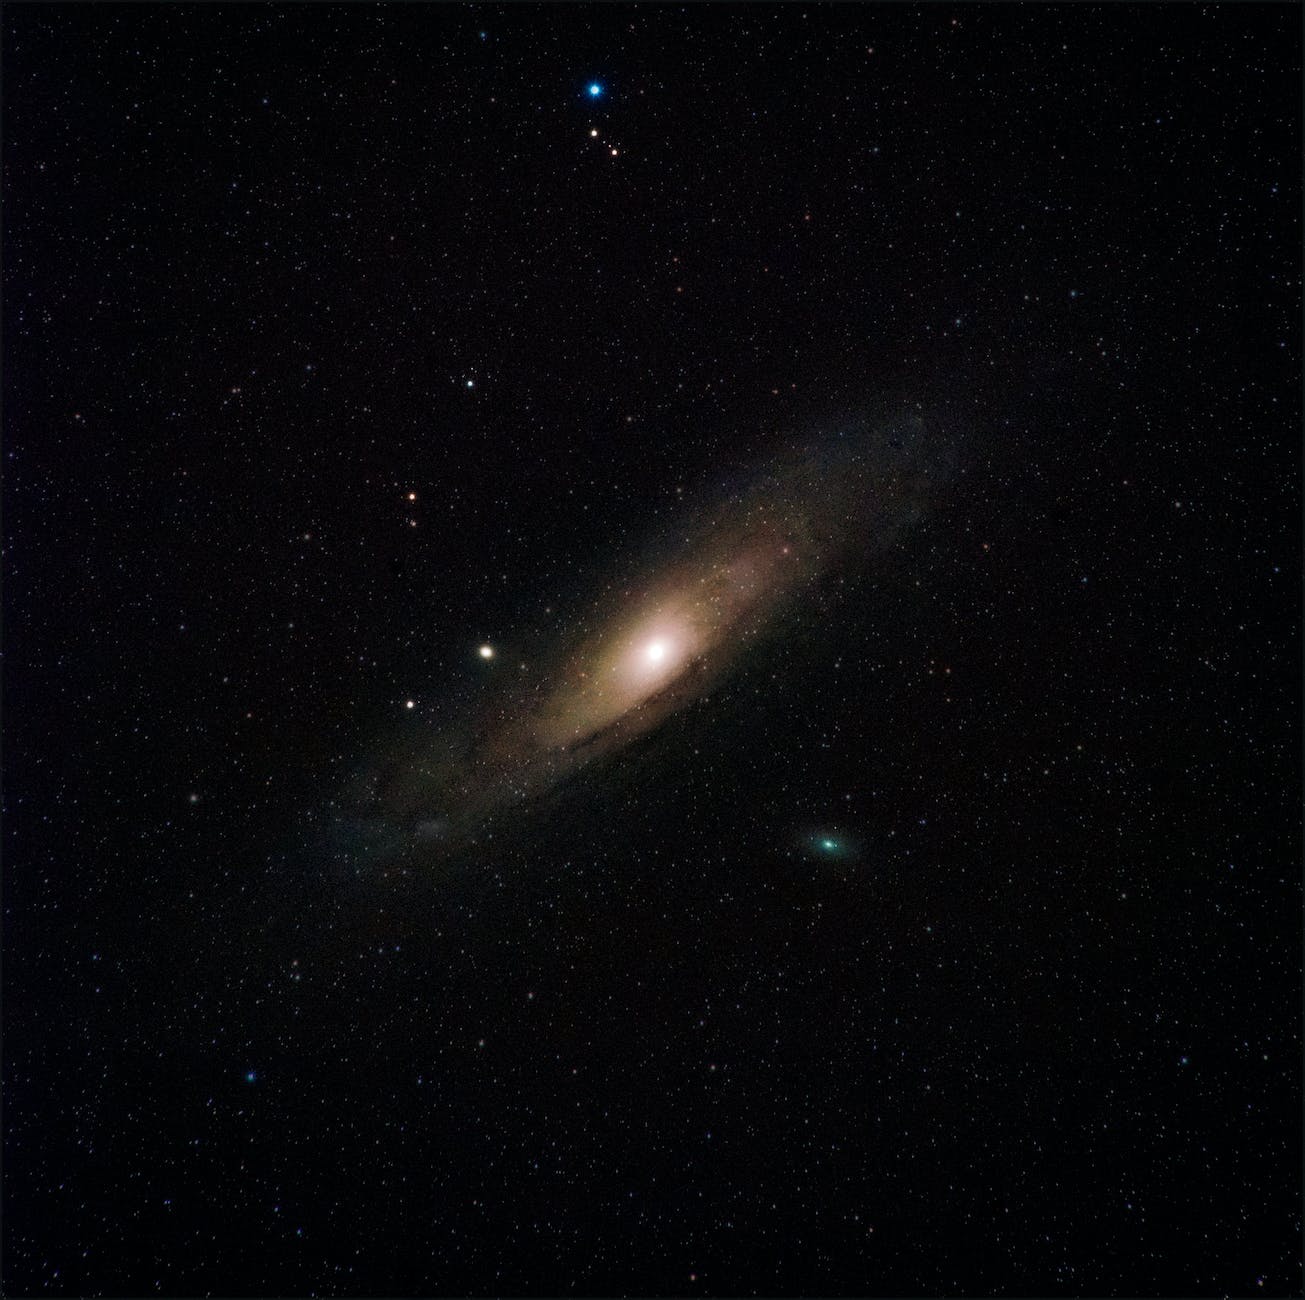
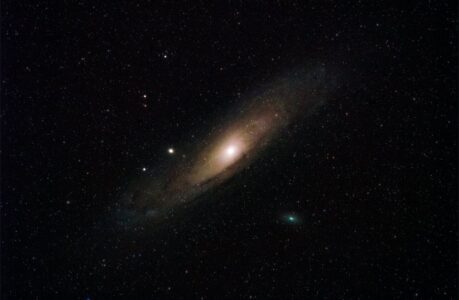
Astrophotography is a captivating and challenging hobby that allows us to capture the breathtaking beauty of the universe. From stunning images of distant galaxies to intricate details of our celestial neighbors, astrophotography offers a glimpse into the cosmos like no other. However, achieving those mesmerizing shots isn’t just about pointing a camera at the night sky and clicking the shutter button. It involves a meticulous process, including the creation and use of dark, bias, and flat frames, which play a crucial role in enhancing the quality of your astrophotographs.
In this comprehensive guide, we will unravel the mysteries of dark, bias, and flat frames in astrophotography. We will delve into their significance, explain why they are indispensable, and provide step-by-step instructions on how to create them. By the end of this article, you will have a deeper understanding of the technical aspects of astrophotography and be better equipped to capture the wonders of the cosmos.
The Magic Behind Astrophotography
Before we dive into the intricacies of dark, bias, and flat frames, let’s begin with a brief overview of astrophotography and its enchanting allure. Astrophotography is the art of capturing images of celestial objects such as stars, planets, galaxies, and nebulae using specialized equipment like telescopes and cameras. It combines science and art to produce breathtaking images that reveal the beauty and mysteries of the universe.
Astrophotography allows us to capture objects that are often too faint or distant to be seen with the naked eye. With the right equipment and techniques, amateur astronomers can produce images that rival those taken by professional observatories. However, achieving such remarkable results requires more than just pointing a camera at the night sky and clicking a button.
The Challenge of Noise
One of the primary challenges in astrophotography is dealing with noise in the images. Noise can manifest as unwanted artifacts, such as graininess or speckles, and can significantly degrade the quality of your astrophotographs. To understand how dark, bias, and flat frames come into play, we need to grasp the nature of this noise.
Sources of Noise
There are several sources of noise in astrophotography, and each can have a detrimental impact on your images:
- Photon Noise: Also known as “shot noise,” this type of noise is inherent to the statistical nature of light. It is more pronounced when capturing faint objects because there are fewer photons to create a smooth image.
- Readout Noise: This noise is introduced when the camera’s sensor is read to capture an image. It is a fixed noise level for a given camera and can be a significant issue, especially in long-exposure astrophotography.
- Thermal Noise: As the camera’s sensor heats up during long exposures, thermal noise becomes a problem. It leads to hot pixels, which are bright spots in the image.
- Amplifier Glow: Some cameras exhibit amplifier glow in the corners of the frame, which is caused by the electronics of the camera.
The Need for Calibration
To mitigate the effects of noise and produce high-quality astrophotographs, astronomers have developed a process known as image calibration. Calibration involves the creation and application of dark, bias, and flat frames, each of which serves a unique purpose in reducing noise and improving image quality.
Frames – Capturing the Shadows of Noise
Dark frames, also known as darks, are a critical component of the calibration process in astrophotography. They are designed to address two primary sources of noise: thermal noise and amplifier glow. Let’s delve into what dark frames are and why they are essential.
What Are Dark Frames?
Dark frames are images taken with the camera’s lens cap or telescope aperture covered, ensuring that no light reaches the sensor. These frames capture the inherent noise generated by the camera’s sensor during exposure. The resulting image is a map of hot pixels, thermal noise, and amplifier glow.
Why Are Dark Frames Necessary?
The importance of dark frames becomes evident when you consider that thermal noise and amplifier glow are not uniform across the sensor. They vary with factors like exposure time and sensor temperature. By capturing dark frames under the same conditions as your light frames (actual astrophotographs), you create a reference to subtract this noise effectively.
How to Create Dark Frames
Creating dark frames is a straightforward process, and it typically involves the following steps:
- Cover the camera’s lens or telescope aperture to block all light.
- Set the camera to the same settings (ISO, exposure time, and temperature) used for capturing your light frames.
- Take a series of dark frames, ideally the same number as your light frames.
Bias Frames – Taming Readout Noise
Bias frames, sometimes referred to as zero-length exposure frames, are essential for combating readout noise. Let’s explore what bias frames are and how they contribute to the calibration process.
What Are Bias Frames?
Bias frames are short-exposure images taken with the camera’s shutter closed. They record the readout noise and any electronic artifacts introduced during the image capture process. Unlike dark frames, bias frames have the shortest possible exposure time, typically around 1/1000th of a second.
Why Are Bias Frames Crucial?
Readout noise is a consistent source of noise in astrophotography, and it affects all pixels equally. By capturing bias frames, you obtain a reference that allows you to subtract this constant noise from your light frames and dark frames. This significantly improves the overall image quality.
How to Create Bias Frames
Creating bias frames is a straightforward process that involves the following steps:
- Ensure that the camera’s lens cap or telescope aperture is covered to block all light.
- Set the camera to the shortest possible exposure time, typically 1/1000th of a second or the shortest available.
- Take a series of bias frames, usually around the same number as your light frames.
Flat Frames – Equalizing Illumination
Flat frames, also known as flats, are a critical component of the calibration process in astrophotography. They address issues related to uneven illumination and dust on the camera’s sensor or telescope optics. Let’s explore the significance of flat frames and how to create them.
What Are Flat Frames?
Flat frames are images captured with a uniform source of light, such as the twilight sky or a specialized flat-field panel. These frames reveal variations in illumination across the camera’s sensor or any imperfections like dust specks or vignetting in the optical system.
Why Are Flat Frames Indispensable?
Flat frames are essential because they provide a reference for the uneven illumination and optical imperfections present in your light frames and dark frames. By dividing your light frames and dark frames by flat frames during calibration, you can correct for these imperfections, resulting in evenly illuminated and clean astrophotographs.
How to Create Flat Frames
Creating flat frames involves the following steps:
- Set up your camera or telescope in the same configuration as when capturing light frames.
- Ensure the camera’s sensor or telescope optics are evenly illuminated. This can be achieved by pointing the camera at the twilight sky or using a flat-field panel.
- Set the camera to the same settings (ISO and exposure time) as your light frames.
- Capture a series of flat frames, ensuring they are not overexposed or underexposed.
The Calibration Process
Now that we have a solid understanding of dark, bias, and flat frames and their respective roles, it’s time to delve into the calibration process itself. Calibration is the act of applying these frames to your light frames to reduce noise, correct for imperfections, and enhance the overall quality of your astrophotographs.
Preparing Your Data
Before you begin the calibration process, ensure you have the following:
- Light frames (your astrophotographs).
- Dark frames, taken under the same conditions as your light frames.
- Bias frames, also taken under the same conditions as your light frames.
- Flat frames, captured with the same settings as your light frames.
Calibrating Your Images
The calibration process typically involves the following steps:
- Dark Frame Subtraction: Subtract the dark frames from your light frames to eliminate thermal noise and amplifier glow. This is usually done by taking the average or median of the dark frames and subtracting it from each light frame.
- Bias Frame Subtraction: Subtract the bias frames from both the light frames and the dark frames to remove readout noise and electronic artifacts.
- Flat Frame Division: Divide your light frames and dark frames by the flat frames to correct for uneven illumination and optical imperfections.
- Stacking: Once your images are calibrated, you can stack them to reduce noise further and enhance the signal-to-noise ratio. Stacking involves aligning and combining multiple frames to create a single, cleaner image.
Software Tools for Calibration
Calibrating astrophotographs can be a complex process, but it’s made significantly more accessible by using dedicated software tools. Here, we’ll explore some popular options for performing calibration.
DeepSkyStacker
DeepSkyStacker is a widely used and free software tool for calibrating and stacking astrophotographs. It offers a user-friendly interface and robust calibration capabilities. Users can easily load their light, dark, bias, and flat frames into the software and follow a step-by-step process to achieve high-quality results.
PixInsight
PixInsight is a powerful and comprehensive software package for astrophotography, which includes advanced calibration and image processing tools. While it has a steeper learning curve compared to some other options, it provides extensive control and customization for calibrating and processing astrophotographs.
Maxim DL
Maxim DL is a versatile software solution that caters to both image acquisition and calibration. It offers a suite of tools for processing astrophotographs, including dark, bias, and flat frame calibration. Maxim DL is favored by many experienced astrophotographers for its robustness and flexibility.
Troubleshooting and Tips
Calibrating astrophotographs can sometimes present challenges, and it’s essential to be prepared for common issues. In this chapter, we’ll cover some troubleshooting tips and offer advice to ensure a smooth calibration process.
Dealing with Hot Pixels
Even after subtracting dark frames, some hot pixels may persist in your images. These are bright spots caused by sensor imperfections. To address them, you can use specialized software or manual techniques to identify and remove hot pixels during post-processing.
Addressing Flat Frame Imperfections
If your flat frames reveal dust specks or other imperfections on your camera sensor or telescope optics, you can use software tools to correct them during post-processing. Alternatively, you may choose to perform sensor or optics cleaning to minimize these issues.
Checking Calibration Consistency
It’s crucial to ensure that your calibration frames (dark, bias, and flat frames) are consistent with your light frames. This includes matching settings such as ISO, exposure time, and temperature. Any discrepancies can lead to ineffective calibration.
The Rewards of Calibration
Calibrating astrophotographs may seem like a meticulous and time-consuming process, but the rewards are well worth the effort. Let’s explore the benefits of calibration and how it can transform your astrophotography.
Enhanced Image Quality
The most immediate benefit of calibration is the substantial improvement in image quality. By removing noise and correcting imperfections, your astrophotographs will appear sharper, cleaner, and more detailed.
Deeper Sky Exploration
Calibration allows you to capture and reveal fainter objects in the night sky. It extends your ability to explore and document the universe, unveiling hidden treasures that may otherwise remain elusive.
Scientific Contributions
For those interested in contributing to scientific research, calibrated astrophotographs can be invaluable. Clean, noise-free images are more likely to be used by researchers and professionals for various studies and analyses.
Dark, Bias and Flat frames
In this extensive guide, we’ve journeyed through the intricate world of astrophotography and the critical role of dark, bias, and flat frames in the calibration process. You now possess the knowledge and tools to create these essential frames and elevate your astrophotography to new heights. Remember, while the calibration process may be meticulous, the rewards of capturing the universe’s wonders in all their glory are immeasurable. So, venture forth, embrace the night sky, and unveil its secrets through the lens of your astrophotography setup.
Happy stargazing, and may your astrophotographs illuminate the beauty of the cosmos for all to see.