Monochrome or Color: Delving into the Dilemma
In the vast expanse of the cosmos, capturing celestial wonders through astrophotography is a pursuit that beckons both amateurs and seasoned enthusiasts alike. Among the myriad choices confronting astrophotographers, the decision between employing a monochrome or color camera for deep-sky imaging stands as a pivotal crossroad. This article embarks on a journey to explore the nuances, advantages, and considerations that shape this enduring debate.
Understanding the Basics
Before delving into the intricacies of monochrome versus color cameras, it’s crucial to grasp the fundamental disparities between the two. Monochrome cameras, typically equipped with grayscale sensors, capture images in black and white. These sensors are sensitive to a broad range of wavelengths, making them adept at detecting faint signals from distant celestial objects. On the other hand, color cameras utilize a Bayer filter array to capture images in full color by interpreting different wavelengths of light. Each pixel on a color sensor is filtered to record either red, green, or blue light, enabling the camera to reproduce a wide spectrum of colors in the final image.
The Aesthetic Appeal of Color
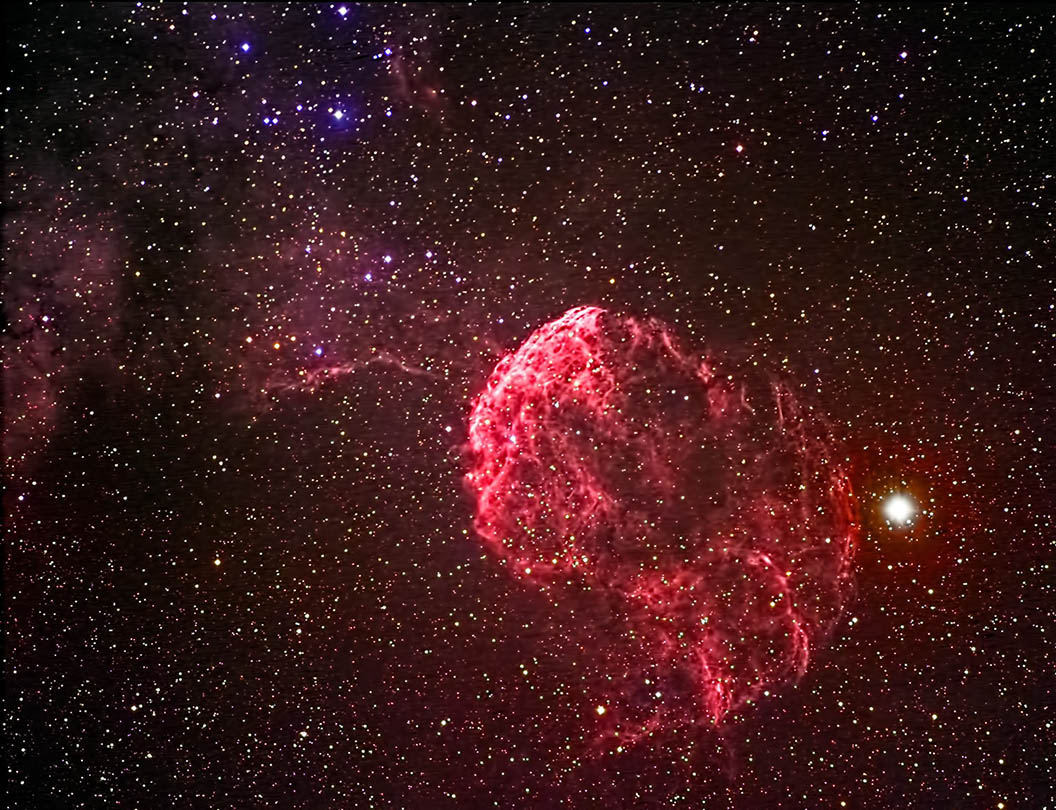
Color photography has an undeniable allure, especially when it comes to capturing the vivid hues of celestial objects. When imaging colorful nebulae, galaxies, or star clusters, a color camera can bring out the subtle nuances and intricate details that might otherwise be lost in monochrome images. The vibrant reds of emission nebulae, the swirling blues of spiral galaxies, and the golden hues of star clusters can evoke a sense of wonder and awe in viewers. Websites like Astrobin showcase stunning color astrophotography that epitomizes the captivating beauty of the cosmos, serving as inspiration for aspiring astrophotographers.
The Power of Monochrome
Despite the allure of color, monochrome cameras wield their own unique strengths in deep-sky astrophotography. By eschewing the color filter array, monochrome sensors boast higher sensitivity and improved signal-to-noise ratio, enabling astrophotographers to capture fainter details with greater clarity. This enhanced sensitivity makes monochrome cameras well-suited for imaging dim, distant objects such as galaxies and nebulae. Additionally, monochrome images can be acquired using narrowband filters, which isolate specific wavelengths of light emitted by celestial objects. These narrowband filters allow astrophotographers to pierce through light pollution and atmospheric distortion, revealing intricate details that might otherwise be obscured.
Navigating Light Pollution
One of the perennial challenges faced by astrophotographers is light pollution, which can obscure faint astronomical objects and diminish image quality. When combating light pollution, monochrome cameras offer a distinct advantage due to their ability to utilize narrowband filters. These specialized filters target specific wavelengths associated with emission nebulae, effectively mitigating the adverse effects of light pollution and unveiling elusive cosmic treasures. By selectively capturing the light emitted by hydrogen-alpha, oxygen, and sulfur, astrophotographers can create stunning images that showcase the intricate structures and delicate filaments of nebulae, even from light-polluted urban areas.
The Role of Flexibility
Flexibility is a key consideration for astrophotographers seeking to adapt to varying imaging conditions and objectives. In this regard, monochrome cameras offer unparalleled versatility, allowing users to experiment with different filters and imaging techniques to achieve desired results. By capturing images in grayscale, monochrome cameras provide greater flexibility in post-processing, empowering astrophotographers to exert precise control over contrast, luminance, and detail enhancement. This flexibility enables astrophotographers to tailor their imaging approach to suit specific targets and conditions, whether they’re imaging bright, star-rich regions or faint, distant galaxies.
Cost Considerations
While both monochrome and color cameras have their merits, cost often emerges as a decisive factor for many astrophotographers. Generally, color cameras tend to be more affordable and accessible, making them an attractive option for beginners or enthusiasts on a budget. The lower cost of entry for color cameras allows aspiring astrophotographers to dive into the hobby without breaking the bank, providing an opportunity to hone their skills and explore the wonders of the universe. Conversely, the higher upfront cost of monochrome cameras, coupled with the need for additional filters, may deter those seeking a more economical entry point into astrophotography. However, for dedicated astrophotographers who prioritize image quality and versatility, the investment in a monochrome camera may prove to be worthwhile in the long run.
The Quest for Scientific Accuracy
For astrophotographers pursuing scientific endeavors or research-oriented projects, the accuracy and fidelity of image data are paramount. In such cases, monochrome cameras reign supreme, offering precise control over photometric measurements and spectral analysis. Institutions like the European Southern Observatory rely on monochrome imaging systems to conduct groundbreaking research and advance our understanding of the cosmos. By capturing images in grayscale and utilizing calibrated filters, monochrome cameras allow researchers to obtain accurate photometric data, enabling detailed analysis of celestial objects’ properties and characteristics. This scientific rigor is essential for studying phenomena such as stellar evolution, galactic dynamics, and cosmological structure formation, contributing to humanity’s collective knowledge of the universe.
Why It Matters: Exploring the Significance
The choice between using a monochrome or color camera for deep-sky astrophotography holds significant implications for astrophotographers, influencing the quality, versatility, and overall experience of capturing celestial wonders. Understanding the pros and cons of each approach is crucial in making informed decisions and achieving desired outcomes in astrophotography.
Pros and Cons of Monochrome Cameras
Pros:
- Higher Sensitivity: Monochrome cameras boast higher sensitivity and improved signal-to-noise ratio compared to color cameras, enabling them to capture fainter details with greater clarity.
- Narrowband Imaging: Monochrome cameras can utilize narrowband filters to isolate specific wavelengths of light emitted by celestial objects, enabling astrophotographers to penetrate light pollution and reveal intricate details.
- Flexibility in Post-Processing: Monochrome images offer greater flexibility in post-processing, allowing astrophotographers to exert precise control over contrast, luminance, and detail enhancement.
- Scientific Accuracy: Monochrome cameras are preferred for scientific endeavors and research-oriented projects due to their ability to provide accurate photometric measurements and spectral analysis.
Cons:
- Higher Cost: Monochrome cameras tend to have a higher upfront cost compared to color cameras, making them less accessible to beginners or enthusiasts on a budget.
- Additional Filters Required: To fully leverage the capabilities of monochrome cameras, astrophotographers may need to invest in additional narrowband filters, adding to the overall cost of the setup.
- Complexity in Workflow: Working with monochrome cameras and narrowband filters may involve a more complex imaging workflow compared to color cameras, requiring additional time and effort in setup and post-processing.
Pros and Cons of Color Cameras
Pros:
- Ease of Use: Color cameras offer a straightforward imaging process, capturing images in full color without the need for additional filters or complex post-processing techniques.
- Affordability: Color cameras are generally more affordable and accessible compared to monochrome cameras, making them an attractive option for beginners or enthusiasts on a budget.
- Wide Range of Targets: Color cameras excel at capturing a wide range of targets, from colorful nebulae and galaxies to star clusters and planetary surfaces.
- Artistic Expression: Color images can evoke a sense of wonder and awe in viewers, showcasing the vibrant hues and intricate details of celestial objects in stunning detail.
Cons:
- Lower Sensitivity: Color cameras typically have lower sensitivity and higher noise levels compared to monochrome cameras, limiting their ability to capture faint details in deep-sky objects.
- Limited Control over Filters: Color cameras utilize a fixed Bayer filter array, limiting astrophotographers’ ability to selectively capture specific wavelengths of light or perform narrowband imaging.
- Reduced Scientific Accuracy: While color cameras are suitable for artistic and visual purposes, they may not provide the level of precision and accuracy required for scientific analysis or research-oriented projects.
Exploring Monochrome Imaging: Beyond Black and White
The notion that monochrome cameras only produce black and white images is a common misconception in the realm of astrophotography. In reality, monochrome cameras are capable of capturing a wide spectrum of colors, albeit through a slightly different process compared to color cameras.
Understanding Monochrome Imaging
Monochrome cameras, equipped with grayscale sensors, capture images in shades of gray, ranging from pure black to pure white. However, the grayscale nature of these images does not imply a lack of color information. Instead, monochrome cameras detect light intensity across the entire visible spectrum, allowing them to record the brightness of celestial objects without the inherent color bias introduced by color filters.
How to Make Color Images with Monochrome cameras
Creating color images from a monochrome camera involves a multi-step process that utilizes narrowband filters and specialized software for post-processing. Below is a step-by-step guide to creating color images from monochrome camera data:
Step 1: Acquire Monochrome Images
Begin by capturing multiple exposures of the target object using your monochrome camera. These exposures should be taken through different narrowband filters, typically targeting wavelengths associated with hydrogen-alpha (Ha), oxygen (OIII), and sulfur (SII) emissions. Ensure that each exposure is properly calibrated for flat-field, dark, and bias frames to minimize noise and artifacts.
Step 2: Image Calibration and Stacking
Calibrate each individual exposure by subtracting dark frames to remove sensor noise, flat-field frames to correct for uneven illumination, and bias frames to eliminate electronic noise. Once calibrated, stack the exposures for each narrowband filter using specialized stacking software such as DeepSkyStacker or PixInsight. Stacking improves signal-to-noise ratio and enhances the overall quality of the images.
Step 3: Registration and Alignment
Align and register the stacked images from each narrowband filter to ensure accurate alignment of the target object. Registration can be performed using reference stars or features present in the images. Proper alignment is essential for precise color registration in the final composite image.
Step 4: Channel Combination
Combine the stacked images from each narrowband filter to create separate grayscale images representing the Ha, OIII, and SII data. Each grayscale image corresponds to a specific color channel in the final color image.
Step 5: Assigning Colors
Assign colors to each grayscale image representing the Ha, OIII, and SII data. The standard color mapping for narrowband imaging is:
- Hydrogen-alpha (Ha): Assign red color.
- Oxygen (OIII): Assign blue-green color.
- Sulfur (SII): Assign red or yellow color.
Step 6: Image Integration
Combine the assigned color channels to create a single RGB (Red-Green-Blue) color image. This can be achieved using image processing software such as Photoshop, PixInsight, or DeepSkyStacker. Ensure proper color balancing and adjust the levels and curves to enhance contrast and overall image quality.
Step 7: Fine-Tuning and Enhancement
Perform any additional adjustments and enhancements to the final color image, such as noise reduction, sharpening, and selective color adjustments. Pay attention to preserving details and maintaining a natural appearance while enhancing the visual impact of the image.
Step 8: Final Touches and Presentation
Once satisfied with the color image, apply any final touches and prepare it for presentation or sharing. Consider adding metadata, captions, and credits to acknowledge the equipment, processing steps, and contributions involved in creating the image. Share your masterpiece with the astrophotography community through online platforms, forums, or social media to inspire and engage fellow enthusiasts.
By following these step-by-step instructions, astrophotographers can transform monochrome camera data into vibrant color images that showcase the beauty and complexity of the cosmos. Experimentation, practice, and attention to detail are key to mastering the art of narrowband imaging and creating stunning color representations of celestial objects.
Monochrome or Color: Embracing the Diversity of Choices
In the realm of deep-sky astrophotography, the choice between monochrome and color cameras embodies a rich tapestry of considerations, preferences, and objectives. While color cameras dazzle with their vibrant portrayals of the cosmos, monochrome cameras unveil the hidden depths and intricacies of celestial phenomena. Ultimately, the decision rests upon the unique aspirations and constraints of each astrophotographer, as they embark on an awe-inspiring journey to capture the wonders of the universe. Whether pursuing artistic expression, scientific inquiry, or simply the joy of exploration, astrophotographers can find fulfillment and inspiration in the diverse array of imaging technologies available, each offering its own perspective on the boundless beauty of the cosmos.

