Unveil the Secrets of Creating Stunning Star Spikes in Your Images
Have you ever gazed up at the night sky and marveled at the brilliance of the stars? Those twinkling celestial bodies have captivated humanity for centuries, inspiring art, science, and, of course, photography. One mesmerizing phenomenon that astrophotographers often aim to capture is the elusive star spike. In this article, we will delve into the fascinating world of star spikes, exploring what they are, how they form, and most importantly, how you can achieve them in your own images.
What Are Star Spikes?
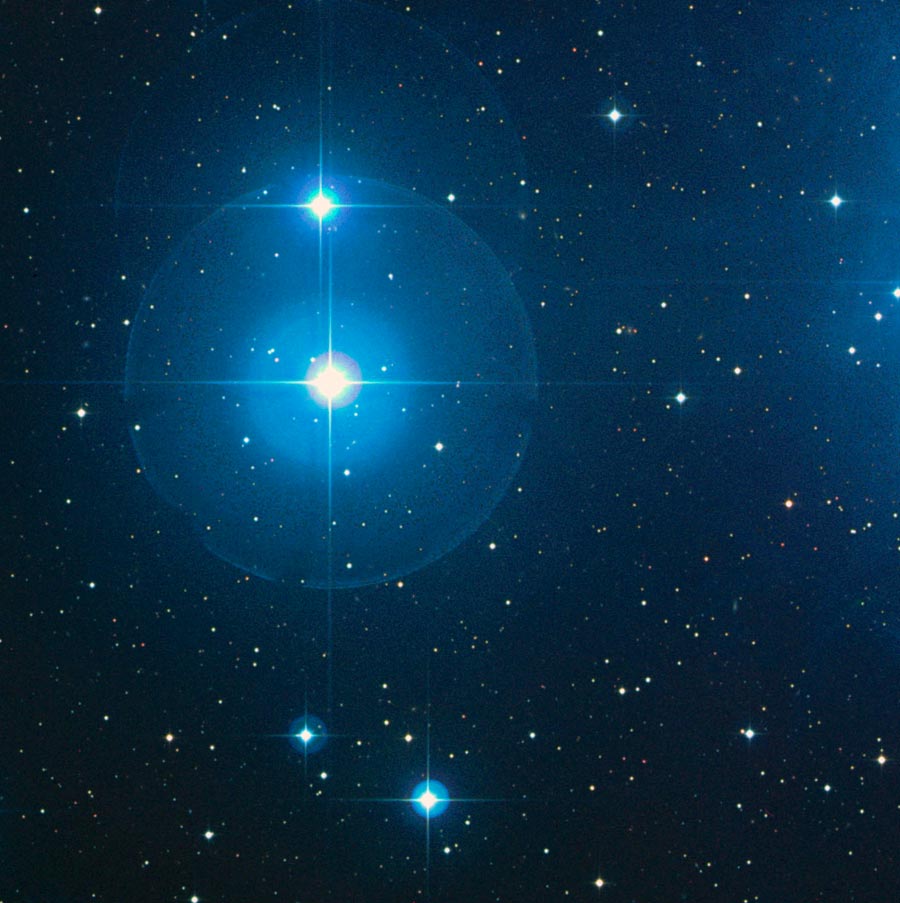
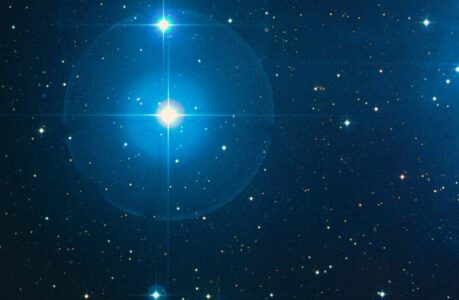
Star spikes, also known as diffraction spikes, are those dazzling, radiating lines that appear to emanate from bright light sources, particularly stars, in photographs. These captivating visual effects are a result of diffraction, a fundamental principle of light wave behavior.
The Science Behind Star Spikes
To understand star spikes, let’s take a brief dive into the science behind diffraction. When light waves encounter an obstacle or aperture, such as the aperture blades in your camera’s lens, they bend and spread out. This bending of light causes the phenomenon known as diffraction, resulting in the light waves interfering with each other.
In a camera lens, the aperture blades create a series of openings for light to pass through. As light passes through these openings, it diffracts and spreads, causing it to form those distinctive spikes around bright points of light in your images.
Why Are Star Spikes Captivating?
Star spikes add an ethereal and magical quality to night sky photography. They transform ordinary stars into mesmerizing, starburst-like patterns that can elevate your astrophotography to a whole new level. These radiant spikes draw the viewer’s eye towards the stars, creating a sense of wonder and awe.
Creating a Sense of Depth
One of the most enchanting aspects of star spikes is their ability to add depth to your images. By emphasizing the brightest points in the night sky, star spikes create a sense of three-dimensionality, making the stars appear as though they are not just distant points of light but sparkling jewels hanging in the cosmic abyss.
Enhancing Visual Interest
Star spikes can also serve as a compositional element, adding visual interest and structure to your photos. They act as natural leading lines, guiding the viewer’s gaze across the frame and providing a captivating framework for your celestial subjects.
Achieving Star Spikes in Your Images
Now that we’ve explored the allure of star spikes, you’re likely eager to know how to capture them in your own photographs. Achieving these stunning effects requires some specific equipment, techniques, and a keen eye for composition.
Equipment You’ll Need
1. A Lens with Aperture Blades: To create star spikes, you’ll need a lens with aperture blades. The number of blades in your lens’s aperture will determine the number of spikes each star will have. Lenses with an even number of blades typically produce the classic, symmetric starburst effect.
2. Tripod: To capture sharp images of the night sky, a sturdy tripod is essential. It will help eliminate camera shake, ensuring your stars are sharp and your spikes well-defined.
3. Remote Shutter Release: A remote shutter release or a timer function on your camera can prevent any vibrations caused by pressing the shutter button manually.
4. Dark Sky Location: Find a location far from light pollution for the best results. Remote areas with minimal artificial light will allow you to capture the full brilliance of the stars.
Setting Up Your Camera
Once you have the necessary equipment, it’s time to set up your camera for capturing star spikes. Follow these steps:
1. Choose Manual Mode: Switch your camera to manual mode to have full control over settings.
2. Select a Wide Aperture: Use a wide aperture, typically in the range of f/2.8 to f/4, to allow more light into the lens.
3. Adjust ISO: Start with a moderate ISO setting, such as ISO 800-1600, to minimize noise in your images.
4. Use a Slow Shutter Speed: A longer exposure time, usually between 15 to 30 seconds, is necessary to capture the faint starlight. However, avoid extremely long exposures to prevent star trailing.
5. Manual Focus: Set your lens to manual focus and carefully focus on a bright star in the sky. Use live view and magnification for precise focusing.
Composing Your Shot
Composition plays a crucial role in creating captivating astrophotography with star spikes. Consider the following tips:
1. Foreground Interest: Include an interesting foreground element, such as a silhouette of a tree, a mountain range, or a landmark. This adds depth and context to your image.
2. Rule of Thirds: Apply the rule of thirds to position your celestial subjects and foreground elements for a balanced and visually pleasing composition.
3. Framing: Use natural frames, such as the branches of a tree or an arch, to encircle your starry scene and draw attention to the night sky.

Capturing the Image
With your camera set up and your composition in place, it’s time to take the shot. Remember to:
1. Minimize Disturbances: Avoid any sudden movements or disturbances near your camera during the exposure, as these can result in blurry images.
2. Use a Remote Shutter Release: If possible, use a remote shutter release or the timer function to trigger the shutter without physically touching the camera.
3. Review and Adjust: After taking a few test shots, review your images on the camera’s LCD screen. Adjust your settings as needed to achieve the desired star spike effect.
Post-Processing for Star Spikes
While capturing star spikes in-camera is essential, post-processing can enhance the final result. Here are some steps you can take:
1. Increase Contrast: Boosting contrast in post-processing can make the spikes more pronounced and the stars stand out.
2. Sharpening: Apply selective sharpening to make the star spikes appear crisper without affecting the entire image.
3. Noise Reduction: Use noise reduction techniques to reduce any unwanted noise, especially if you shot at a high ISO.
4. Color Correction: Adjust the color balance to bring out the natural colors of the stars and the night sky.
Creative Variations of Star Spikes
Now that you’ve mastered the basics of capturing star spikes, it’s time to get creative. There are various ways to experiment and add your own unique touch to your astrophotography.
Multi-Star Spikes
While most star spike images capture individual stars with symmetric spikes, you can experiment by capturing multiple stars in a single frame. The resulting image will have a captivating blend of starbursts and spikes, creating a mesmerizing visual display.
Star Trails and Star Spikes
Combining star trails with star spikes can result in breathtaking compositions. To achieve this effect, use a longer exposure time, such as several minutes or even hours, and capture the apparent movement of the stars across the night sky. The combination of streaking star trails and radiant spikes can yield stunning and dynamic images.
Silhouettes and Star Spikes
Incorporating silhouettes of trees, buildings, or other objects against the night sky can produce dramatic contrasts. The dark shapes create a compelling backdrop for the bright stars and their spikes, emphasizing the celestial beauty.
Famous Examples of Star Spike Photography
To truly appreciate the art of capturing star spikes, let’s take a look at some famous examples that have left a lasting impact in the world of astrophotography.
“Starry Night” by Vincent van Gogh
Vincent van Gogh’s iconic painting “Starry Night” is a timeless masterpiece that features swirling starry skies with prominent star spikes. While this artwork is a painting rather than a photograph, it remains an inspiration for astrophotographers worldwide.
“Pillars of Creation” by Hubble Space Telescope

The Hubble Space Telescope captured the awe-inspiring “Pillars of Creation” image, showcasing towering columns of interstellar dust and gas in the Eagle Nebula. The stars in this image exhibit prominent star spikes, adding to the otherworldly beauty of the cosmic scene.
Challenges and Tips for Success
While capturing star spikes can be a rewarding endeavor, it comes with its own set of challenges. Here are some common issues you may encounter and tips to overcome them.
Light Pollution
Light pollution from cities and urban areas can wash out the night sky, making it challenging to capture stars with clarity. To combat this issue, travel to remote locations with minimal light pollution, or use light pollution filters to enhance your images.
Cloud Cover
The weather can be unpredictable, and cloudy skies can thwart your plans for starry night photography. Keep an eye on weather forecasts and plan your outings on clear nights. Alternatively, incorporate cloud formations into your compositions to add drama to your images.
Star Trailing
Star trailing occurs when stars appear as streaks in your photos due to long exposures. To avoid this, use a wider-angle lens, a faster aperture, and shorter exposure times. Alternatively, invest in an equatorial mount that tracks the motion of the stars.
Focusing Difficulties
Achieving precise focus in low-light conditions can be challenging. To tackle this issue, use manual focus and take test shots with live view magnification to ensure your stars are sharp and your spikes well-defined.
Patience and Persistence
Astrophotography, including star spikes, often requires patience and persistence. Be prepared for multiple attempts and learn from each outing to improve your skills over time.
Showcase Your Star Spikes
Now that you have a comprehensive understanding of star spikes and how to capture them, it’s time to embark on your own celestial adventures. Armed with the right equipment, techniques, and creative inspiration, you can produce stunning images that showcase the mesmerizing beauty of the night sky.
Whether you’re capturing the majesty of the Milky Way, the brilliance of a meteor shower, or the quiet serenity of a moonlit night, star spikes are your ticket to unlocking the magic of the cosmos through your camera lens.
So, gear up, head to a dark, starry location, and let your photography skills shine as brightly as the stars above. With dedication and practice, you’ll soon be creating captivating images that leave a lasting impression and inspire others to look up and dream.
Capture the magic, and share your star spike masterpieces with the world!
Disclaimer: The images “Starry Night” by Vincent van Gogh and “Pillars of Creation” by the Hubble Space Telescope are used for illustrative purposes only. They are not associated with the creation of star spike images.
For further inspiration and astrophotography resources, check out the following links:
- Astrophotography Tips and Techniques
- Best Lenses for Astrophotography
- International Dark-Sky Association – Find dark-sky locations near you for optimal stargazing and photography opportunities.