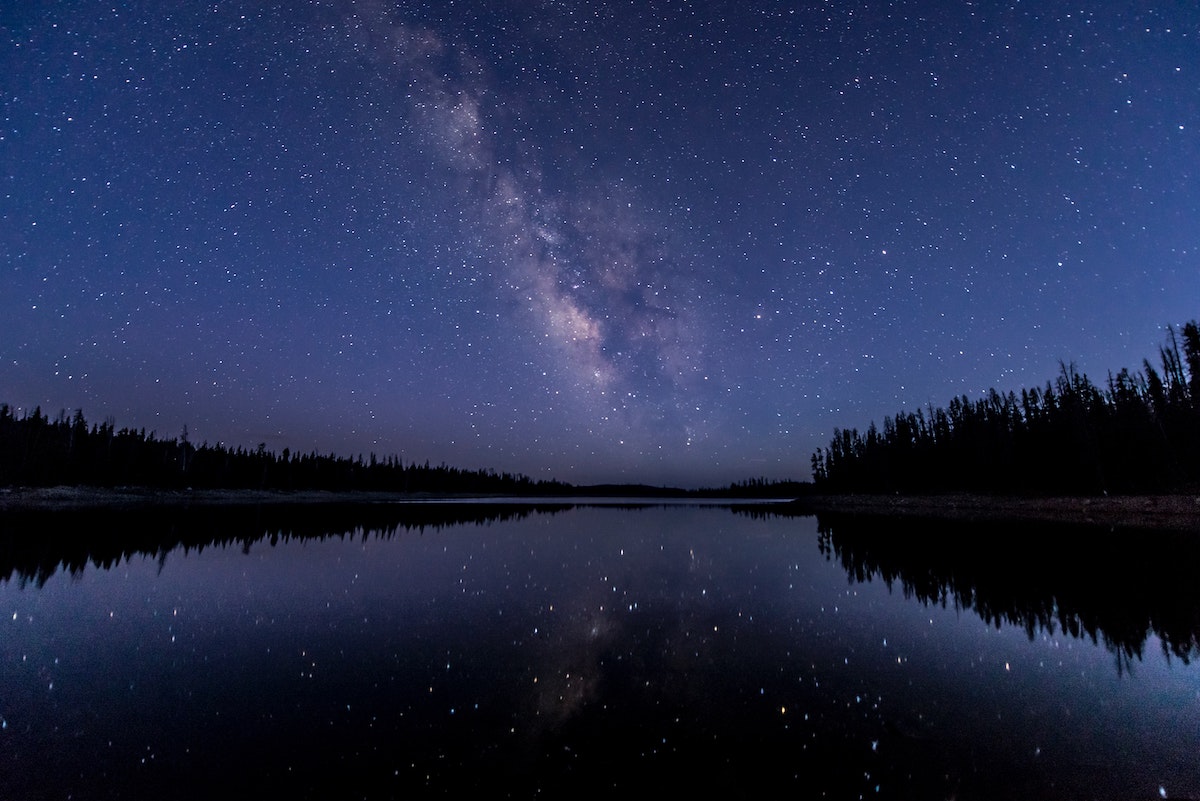
Astrophotography is an incredible and rewarding hobby, but it can also be a challenging one. Capturing the beauty of the night sky requires a combination of technical skill, patience, and creativity. Whether you’re a beginner or an experienced photographer, these 20 astrophotography tips will help you take your night sky photography to the next level.
- Choose the Right Camera: Not all cameras are created equal when it comes to astrophotography. Look for a camera with high ISO capabilities and a full-frame sensor for optimal results.
- Use a Wide-Angle Lens: A wide-angle lens will allow you to capture more of the night sky in a single frame.
- Find Dark Skies: The darker the skies, the more stars you’ll be able to see and capture in your photos. Avoid light pollution as much as possible.
- Use a Tripod: A stable tripod is essential for sharp, clear shots, especially when using longer exposures.
- Master Long Exposures: Long exposures are necessary for capturing the dim light of stars and the Milky Way. Experiment with exposure times to find the sweet spot for your camera and lens.
- Shoot in RAW: Shooting in RAW format will give you more flexibility in post-processing and allow you to correct any mistakes in exposure or white balance.
- Set a Custom White Balance: The colour of the night sky can vary depending on the time of night and location. Setting a custom white balance will help ensure accurate colours in your photos.
- Use a Remote Shutter Release: A remote shutter release will eliminate any camera shake from pressing the shutter button and help you achieve sharper shots.
- Learn to Focus Manually: Autofocus can struggle in low-light conditions. Learning to focus manually will help you achieve sharper shots.
- Consider Image Stacking: Image stacking involves combining multiple shots of the same scene to reduce noise and improve sharpness.
- Experiment with Different Compositions: Don’t be afraid to try different compositions and angles to find the most interesting and creative shots.
- Include Foreground Interest: Including a foreground element in your shot, such as a tree or rock formation, can add depth and interest to your photos.
- Avoid Overexposure: Overexposure can wash out the stars and ruin the atmosphere of your shot. Experiment with exposure times to find the right balance.
- Be Prepared for the Weather: Shooting at night can be cold and damp. Dress appropriately and bring extra batteries and equipment to keep warm and dry.
- Experiment with Filters: Filters, such as a light pollution filter or polarising filter, can help improve the quality of your shots and reduce unwanted light.
- Plan Your Shots: Use apps and websites to plan your shots and find the best time and location for the night sky and Milky Way.
- Stay Safe: Shooting at night can be dangerous. Bring a friend, tell someone where you’re going, and be aware of your surroundings.
- Have Fun: Above all, astrophotography should be fun and rewarding. Experiment, be creative, and enjoy the beauty of the night sky.
What are RAW images
RAW images are unprocessed image files that are captured by a digital camera. Unlike JPEG images, which are processed and compressed by the camera’s software before being saved, RAW files retain all of the information captured by the camera’s sensor. This means that RAW images are larger in size and contain more detail, colour information, and dynamic range than JPEG images. RAW files are often used by professional photographers who want to have more control over the final image during post-processing. Because RAW files are unprocessed, they require specialised software to view and edit. Popular RAW file formats include CR2 (Canon), NEF (Nikon), and ARW (Sony).
How can I find Dark skies near me?
To find dark skies near you, you can use online resources such as light pollution maps or dark sky locators. Here are some steps to help you find dark skies near you:
- Use a light pollution map: Websites like darksitefinder.com and lightpollutionmap.info offer interactive maps that show light pollution levels around the world. You can zoom in to your location to see how bright the skies are in your area and where the darkest spots are.
- Check for designated dark sky areas: Some parks and natural areas have been designated as dark sky areas by organisations like the International Dark-Sky Association. You can search their directory to find dark sky parks or reserves near you.
- Ask local astronomy groups or clubs: Local astronomy groups or clubs are a great resource for finding dark sky locations near you. They may have information on good spots to observe or photograph the night sky.
- Look for rural areas: Dark skies are typically found in rural areas with low light pollution. Look for areas with low population density, away from cities or major roads.
- Check weather conditions: Even if you find a dark sky location, weather conditions like cloud cover or fog can make it difficult to see the stars. Check weather forecasts before heading out to ensure optimal viewing conditions.
Remember to always practise safety when venturing out to remote or unfamiliar locations. Let someone know where you’re going, bring appropriate gear, and be aware of your surroundings.
What is white balance?
White balance is a camera setting that determines how colours are represented in a photograph. It is used to ensure that white objects appear white in the photo, regardless of the colour temperature of the light source.
The colour temperature of light is measured in Kelvin and can vary from warm (yellow/orange) to cool (blue). A camera’s white balance setting can be adjusted to compensate for these different colour temperatures, so that the colours in the photograph appear natural and accurate.
Most cameras offer several white balance settings, such as daylight, cloudy, shade, tungsten, fluorescent, and auto white balance. In addition to these presets, some cameras also offer a custom white balance option, which allows you to manually adjust the white balance for a specific lighting condition.
Choosing the correct white balance setting can greatly improve the overall colour accuracy of your photos. It’s important to pay attention to the lighting conditions and adjust the white balance setting accordingly to achieve the desired result.
Why would I use a long exposure and how can I mitigate problems with long exposures
Using a long exposure can be useful in astrophotography to capture more light and detail in low-light situations. It allows you to capture dim objects, such as stars or the Milky Way, that might not be visible in a shorter exposure.
However, there are some potential problems with using long exposures that you need to be aware of, and there are ways to mitigate these problems:
- Camera Shake: Any movement or vibration in the camera or tripod during the long exposure can result in a blurry photo. To mitigate this, use a sturdy tripod and a remote shutter release or self-timer to avoid touching the camera during the exposure.
- Noise: Long exposures can generate heat in the camera’s sensor, which can lead to increased noise in the photo. To reduce this, you can take shorter exposures and then stack them together in post-processing.
- Overexposure: In a long exposure, it can be easy to overexpose the photo, especially if there is any light pollution. To avoid overexposure, use a smaller aperture (higher f-number) or a neutral density filter to reduce the amount of light entering the camera.
- Star Trails: If you’re photographing the stars, a long exposure can result in visible star trails caused by the Earth’s rotation. To avoid this, use a shorter exposure time or a tracking mount to follow the movement of the stars.
- Battery Life: Long exposures can drain the camera battery quickly. To ensure you have enough power, bring extra batteries or use an AC adapter if possible.
With some practice and experimentation, you can use long exposures to create stunning astrophotography images. Just remember to be aware of the potential problems and take steps to mitigate them.
What is a remote shutter release and why should I use one?
A remote shutter release is a device used to remotely trigger the camera’s shutter, without physically touching the camera. This allows you to avoid camera shake that can occur when pressing the camera’s shutter button.
There are two types of remote shutter releases: wired and wireless. A wired remote shutter release connects to the camera via a cable, while a wireless remote connects to the camera via a wireless signal.
Using a remote shutter release has several advantages in photography:
- Reduced Camera Shake: By not physically touching the camera, you can avoid any movement or vibration that could cause camera shake and result in blurry photos.
- Improved Sharpness: With less camera shake, you can achieve sharper images, particularly when using longer exposure times.
- Improved Timing: A remote shutter release allows you to capture the shot at the exact moment you want, such as a specific moment in a fireworks display or a fleeting animal in wildlife photography.
- Increased Creativity: A remote shutter release can also allow you to experiment with more creative techniques, such as long exposure or time-lapse photography.
Using a remote shutter release can be particularly beneficial in astrophotography, where long exposures and camera stability are essential for capturing the night sky.
Overall, a remote shutter release is a simple but powerful tool that can improve the quality of your photos and expand your creative possibilities.
What is image stacking and how does it work?
Image stacking is a technique used in photography to combine multiple images of the same subject into one final image. This technique is often used in astrophotography to create a final image that is cleaner, sharper, and with less noise than a single exposure.
The basic idea behind image stacking is to take multiple photos of the same subject and combine them in post-processing using specialised software. Each photo should be identical in composition and exposure settings. The software then aligns and blends the images, taking only the best parts of each photo to create a final, noise-free image.
The primary benefit of image stacking is that it allows you to reduce noise in your photos. When you take a single long exposure, the sensor heats up and generates noise, which can appear as graininess in the image. By taking several shorter exposures and combining them, you can reduce the amount of noise in the final image.
Another benefit of image stacking is that it allows you to capture more detail and color in the final image. By combining multiple photos, you can achieve greater dynamic range and color depth than you would with a single photo.
Image stacking can be done manually using image editing software like Photoshop, but there are also specialised software programs available that make the process easier and faster, such as DeepSkyStacker and Starry Landscape Stacker.
Overall, image stacking is a powerful technique that can help you achieve cleaner, sharper, and more detailed photos, particularly in astrophotography.

