Introduction
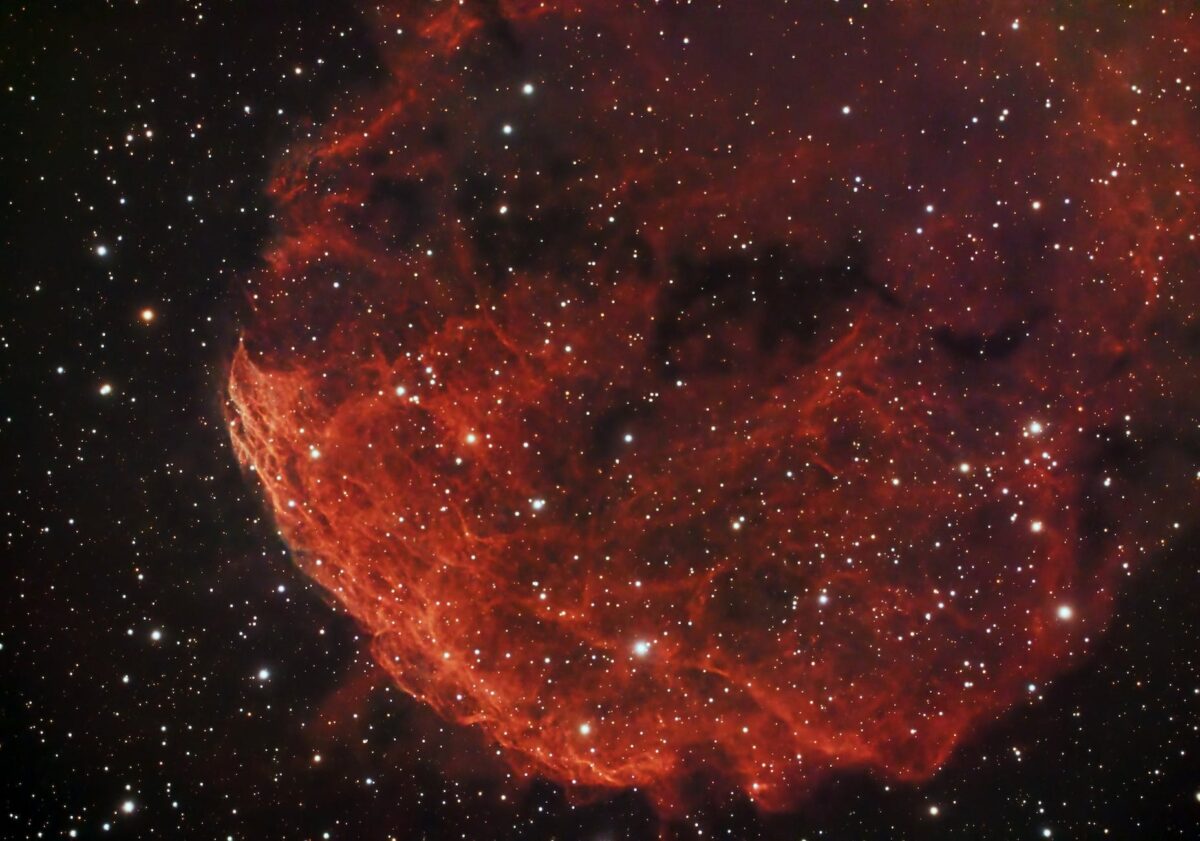
Astrophotography allows us to capture the breathtaking beauty of the night sky, revealing celestial wonders that our eyes alone cannot perceive. However, capturing the majesty of stars, galaxies, and nebulae demands more than just a simple snapshot. It requires a technique known as “stacking,” where multiple images are combined to reduce noise, enhance detail, and reveal hidden cosmic treasures. In this guide, we delve into the world of astrophotography stacking using Siril, a powerful, open-source image processing tool designed specifically for astrophotographers. Whether you’re new to astrophotography or a seasoned sky-gazer looking to take your skills to the next level, let’s embark on an exciting journey to unlock the secrets of stacking with Siril.
What is Stacking?
Stacking, in the context of astrophotography, is the process of combining multiple photographs of the same astronomical object or scene to create a single, high-quality image. Unlike traditional photography, where multiple exposures might result in overexposed images, stacking leverages the power of statistical averaging to improve image quality. By stacking numerous frames, the final image gains greater signal-to-noise ratio, increased resolution, and enhanced details, making it an indispensable technique for capturing the elusive and faint details of celestial objects.
Introducing Siril: The Star of Astrophotography Stacking
Siril, short for “Software for Image Recovery and Interferometry by Luc Coiffier,” is a free and open-source image processing tool developed explicitly for astrophotography enthusiasts. Its intuitive interface and extensive features make it accessible to both beginners and advanced users alike. Siril supports various image formats, including DSLR raw files and specialized astronomy formats like FITS (Flexible Image Transport System). Whether you’re photographing the Moon, planets, or distant galaxies, Siril is a versatile tool that can significantly enhance the quality of your astrophotographs.
Getting Started with Siril
1. Downloading and Installing Siril
To begin your astrophotography stacking journey, head to the official Siril website (www.siril.org) and download the latest version of the software compatible with your operating system. Siril is available for Windows, macOS, and various Linux distributions. Once the download is complete, follow the installation instructions for your specific OS to set up Siril on your computer.
2. Capturing Astrophotography Data
Before diving into stacking with Siril, you’ll need to capture the raw material: astrophotography data. This process involves taking multiple exposures of your chosen celestial subject. For beginners, it’s best to start with wide-field targets like the Milky Way or constellations. All you need is a DSLR or mirrorless camera mounted on a sturdy tripod and a wide-angle lens with a low aperture (f/2.8 or lower) for optimal light gathering.
To minimize star trailing during long exposures, consider using an equatorial mount or a star tracker. Additionally, remote locations with minimal light pollution are ideal for capturing stunning night sky images.
3. Preparing Images for Stacking
Once you’ve collected a series of exposures, it’s time to prepare your images for stacking in Siril. Begin by transferring the images to your computer. If you’ve captured your photos in raw format, it’s recommended to perform basic pre-processing tasks in software like Adobe Lightroom or RawTherapee before moving on to Siril.
Tasks such as white balance adjustment, noise reduction, and lens correction can be accomplished in these pre-processing tools. Keep in mind that Siril does have basic preprocessing capabilities, but many astrophotographers prefer using specialized software for these initial adjustments.
Understanding Siril’s Workflow
Before we delve into the actual stacking process, let’s familiarize ourselves with Siril’s workflow. Siril adopts a non-destructive approach, meaning it never alters your original image files. Instead, it creates intermediary files and saves all changes in separate files while retaining the original data.
The primary workflow in Siril is as follows:
- Open: Load your light frames (exposures) into Siril.
- Dark, Bias, and Flat Frames: If you have captured dark, bias, and flat frames (calibration frames), load them as well. These frames are essential for calibration, which we’ll discuss later.
- Registration: Align all light frames to compensate for any tracking errors or slight movements during the capture.
- Stacking: Perform the actual stacking process to combine the registered frames into a single stacked image.
- Post-Processing: Apply final adjustments to the stacked image to enhance its visual appeal and reveal the full splendor of the captured celestial object.
Calibrating Your Images: Dark, Bias, and Flat Frames
Calibration is a crucial step in astrophotography stacking, as it corrects for various artifacts and noise present in your images. The calibration process involves three types of frames:
- Dark Frames: These are images taken with the camera’s lens cap on or with the camera sensor completely covered, using the same exposure settings as your light frames. Dark frames capture the camera’s inherent noise, which will later be subtracted from your light frames.
- Bias Frames (also known as Offset Frames): Bias frames are extremely short exposures taken with the lens cap on and with the shortest exposure time possible. They record the camera’s readout noise, which is then removed from your light frames during calibration.
- Flat Frames: Flat frames are pictures of a uniformly illuminated surface, typically taken with a white T-shirt or a purpose-built flat field panel covering the camera lens. They help correct for uneven illumination and dust specks on your sensor.
Capturing Calibration Frames
To capture calibration frames, keep your camera settings identical to those used for the light frames. Capture a series of dark frames, bias frames, and flat frames. For dark frames and bias frames, ensure that the camera remains covered throughout the exposures.
Loading Calibration Frames into Siril
Once you have your calibration frames ready, open Siril and go to the “Pre-processing” tab. Load each type of calibration frame into the corresponding category (dark, bias, or flat). Siril will use this information to calibrate your light frames during the stacking process.
Registering Your Light Frames
Image registration, also known as image alignment or image stacking, is a critical step that compensates for any slight movements or tracking errors that may have occurred during the capture of your light frames. This alignment ensures that all frames are precisely superimposed upon each other, maximizing the quality of the final stacked image.
Performing Image Registration in Siril
In Siril, head to the “Alignment” tab to perform image registration. Follow these steps:
- Load Light Frames: Load all your light frames into Siril.
- Select Reference Frame: Choose one of your light frames as the reference frame. The other frames will be aligned to this reference frame.
- Star Detection: Click on “Star Detection” to identify stars in the reference frame and the other light frames.
- Registration: Click “Register Checked” to align the light frames to the reference frame. Siril will perform a translation, rotation, and scaling alignment to optimize the superposition of stars.
The image registration process may take some time, depending on the number of frames and the processing power of your computer. Once completed, you’ll have a set of registered light frames, ready for the stacking process.
The Magic of Stacking: Combining Your Images
Finally, we arrive at the heart of astrophotography stacking—combining your registered light frames into a single stacked image. This process significantly improves the signal-to-noise ratio and enhances the overall quality of your astrophotograph.
Performing Stacking in Siril
To stack your light frames using Siril, follow these steps:
- Load Registered Light Frames: Open Siril and go to the “Stacking” tab. Load the registered light frames into Siril.
- Integration Method: Choose the integration method that suits your astrophotography data best. Siril offers different algorithms, including Average, Median, Kappa-Sigma, and Maximum, each catering to different types of astrophotographs.
- Integration Settings: Configure the integration settings based on your preference and the characteristics of your data. These settings include rejection thresholds, sigma values, and percentage clipping, among others.
- Perform Stacking: Click on “Stack Checked” to initiate the stacking process. Siril will combine your registered light frames using the selected integration method and settings.
The time required for stacking depends on the number of frames, the integration method chosen, and the processing power of your computer. Once finished, you’ll be left with a stunning, stacked image revealing the hidden beauty of the cosmos.
Post-Processing: Enhancing Your Stacked Image
After successfully stacking your astrophotography data, you may find that your stacked image still requires some post-processing to optimize its visual appeal. Post-processing is a creative step where you can bring out the fine details, adjust colors, and balance contrast to showcase the celestial object in all its glory.
Post-Processing in Siril
Siril offers basic post-processing tools to refine your stacked image. In the “Processing” tab, you can apply various adjustments, such as:
- Histogram Stretch: Enhance the brightness and contrast of your image by stretching the histogram.
- Curves Transformation: Fine-tune the tonal range of your image using curves adjustments.
- Color Balance: Adjust the color balance to highlight specific features or enhance the overall appearance of the image.
- Sharpening: Apply gentle sharpening to reveal finer details.
Keep in mind that Siril’s post-processing capabilities are not as extensive as dedicated image editing software like Adobe Photoshop or GIMP. Many astrophotographers prefer to transfer their stacked images to these tools for further refinement and creative adjustments.
Common Challenges and Troubleshooting
As with any technical endeavor, astrophotography stacking with Siril may come with its own set of challenges. Some common issues include:
- Star Trails: Star trailing occurs when the stars appear elongated due to the Earth’s rotation during long exposures. Using an equatorial mount or a star tracker can help mitigate this problem.
- Saturation and Clipping: Overexposed regions can lead to irrecoverable loss of detail. Adjust your exposure settings accordingly to avoid clipping.
- Hot Pixels and Noise: Despite calibration, hot pixels (bright dots) and noise can still be present. Post-processing with noise reduction algorithms can help alleviate this issue.
If you encounter any issues during the stacking process or post-processing, there is an active community of Siril users and developers that can provide valuable assistance and guidance.
Experimenting and Expanding Your Horizons
Astrophotography is an ever-evolving art form, and Siril’s powerful stacking capabilities open up a world of possibilities for photographers and astronomers alike. As you gain experience with stacking, don’t hesitate to experiment with different integration methods, calibration settings, and post-processing techniques.
Furthermore, as you advance in your astrophotography journey, you may want to explore narrowband imaging, time-lapse photography of celestial events, or deep-sky imaging of distant galaxies and nebulae. Siril remains a faithful companion throughout your progression, supporting you in capturing the wonders of the universe.
Conclusion
Astrophotography stacking with Siril is a captivating and rewarding process that allows us to capture the enchanting beauty of the night sky. By combining multiple exposures, we can reveal the hidden details of celestial objects and share the wonders of the cosmos with the world.
With Siril’s user-friendly interface and powerful capabilities, both beginners and seasoned astrophotographers can unlock the secrets of stacking and create breathtaking astrophotographs. So, equip yourself with your camera, set up Siril, and embark on an incredible journey to explore the universe through the lens of astrophotography. Happy shooting and stacking!

